6.8 KiB
权限配置
介绍
在实际开发中,我们经常需要根据项目需求进行一个权限的控制,例如:菜单的权限,页面的按钮权限,这样做的好处是可以让每个用户都能专注于自己的业务。
本系项目前提供了两种权限控制的示例,当然,都是比较简单的,只是给开发者提供一点思路和借鉴而已。一般来讲,权限控制可以是前端控制,也可以是后端控制。两种都有自个的优势:
前端控制权限,那本质上就是以静态路由表为准,后端接口只提供简单的配置规则,然后有前端进行循环遍历,筛选出所需要的路由,然后进行动态路由的生成。优势在于比较快捷,所有的配置都已经在静态路由表中配置好了。劣势就是不太灵活,假如需要换下菜单的顺序或者更改菜单的名称,都需要前端这边修改完之后重新打包部署。
前端控制权限
我们可以看下本项目的前端路由控制逻辑,具体代码在src/views/role-demo/role/components/InfoWrite.vue
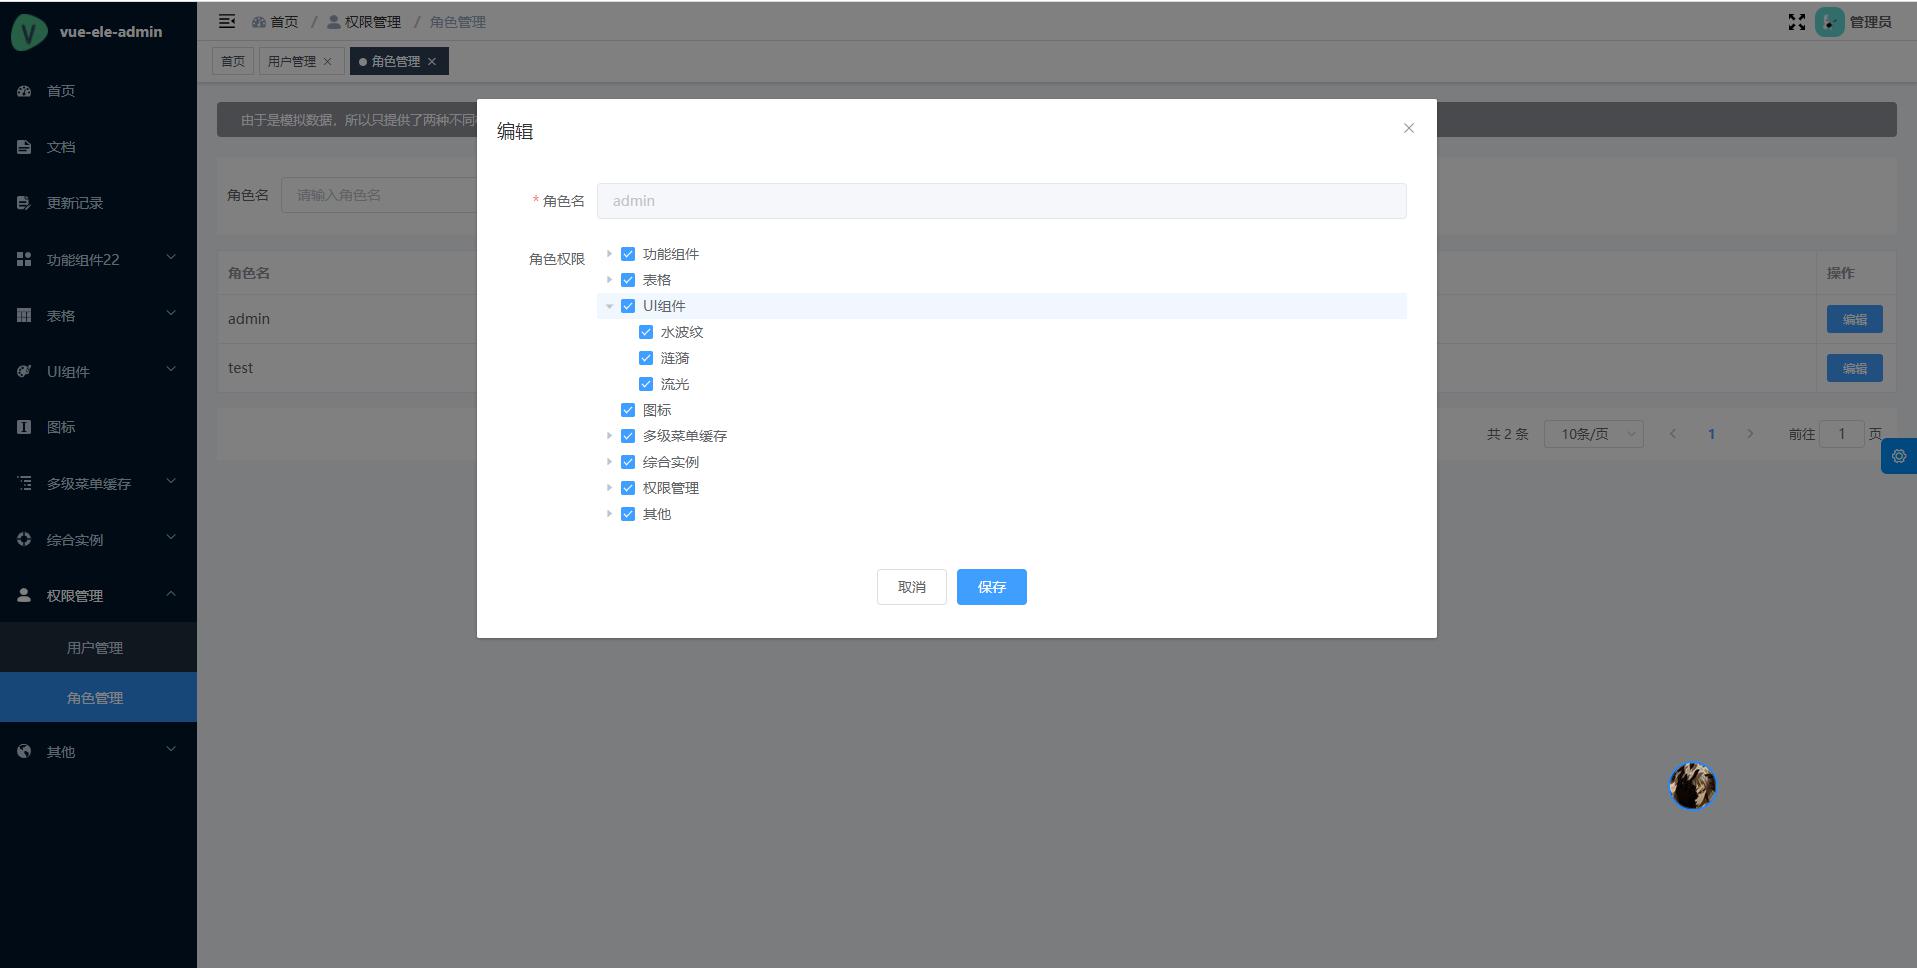
前端控制的例子的界面相对简单,我们直接看保存之后的逻辑:
// 获取所有被选中节点,由于是前端渲染,所以只要保存一维数组就行
form.checkedNodes = (tree.value as any).getCheckedNodes(false, true)
console.log(JSON.stringify(form.checkedNodes))
// 获取所有被选中的keys,便于渲染是否选中
form.checkedkeys = (tree.value as any).getCheckedKeys()
console.log(JSON.stringify(form.checkedkeys))
我们通过Element-ui Tree组件提供的API,可以轻松的获取到被选中的数据。之后就可以调用后端接口进行权限数据的保存了,当然,开发者可以根据实际情况进行扩展,流程大体是一致的。
之后,用户登录的时候,我们就可以拿到对应的权限数据,进行动态渲染了。权限过滤的逻辑主要在src/store/modules/permission.ts中的generateRoutes方法:
// 路由过滤,主要用于权限控制
function generateRoutesFn(routes: AppRouteRecordRaw[], basePath = '/'): AppRouteRecordRaw[] {
  const res: AppRouteRecordRaw[] = []

  for (const route of routes) {
    // skip some route
    if (route.meta && route.meta.hidden && !route.meta.showMainRoute) {
      console.log(route)
      continue
    }

    let onlyOneChild: Nullable<string> = null

    if (route.children && route.children.length === 1 && !route.meta.alwaysShow) {
      onlyOneChild = (
        isExternal(route.children[0].path)
          ? route.children[0].path
          : path.resolve(path.resolve(basePath, route.path), route.children[0].path)
      ) as string
    }

    let data: Nullable<IObj> = null

    // 如不需要路由权限,可注释以下逻辑
    // 权限过滤,通过获取登录信息里面的角色权限,动态的渲染菜单。
    const list = wsCache.get(appStore.getUserInfo).checkedNodes
    // 开发者可以根据实际情况进行扩展
    for (const item of list) {
      // 通过路径去匹配
      if (isExternal(item.path) && (onlyOneChild === item.path || route.path === item.path)) {
        data = Object.assign({}, route)
      } else {
        const routePath = path.resolve(basePath, onlyOneChild || route.path)
        if (routePath === item.path || (route.meta && route.meta.followRoute === item.path)) {
          data = Object.assign({}, route)
        }
      }
    }
    // 如不需要路由权限,解注释下面一行
    // data = Object.assign({}, route)

    // recursive child routes
    if (route.children && data) {
      data.children = generateRoutesFn(route.children, path.resolve(basePath, data.path))
    }
    if (data) {
      res.push(data as AppRouteRecordRaw)
    }
  }
  return res
}
::: tip 提示 由于是前端控制,所以我们存储在后端的权限数据,可以是一维数组,或者直接拿被选中的keys进行过滤,这个也是完全根据实际情况来的。 :::
后端控制权限
由于在静态路由表配置中,我们会把一些相关展示配置放在meta中,如果是以后端控制为主,我们项目中的静态路由表基本上没什么作用了。我们需要把meta中的配置放到后端中,有后端去统一管理。基本上,前端静态路由表就没什么用了。
我们可以看下本项目的后路由控制逻辑,具体代码在src/views/role-demo/role/components/InfoWrite2.vue
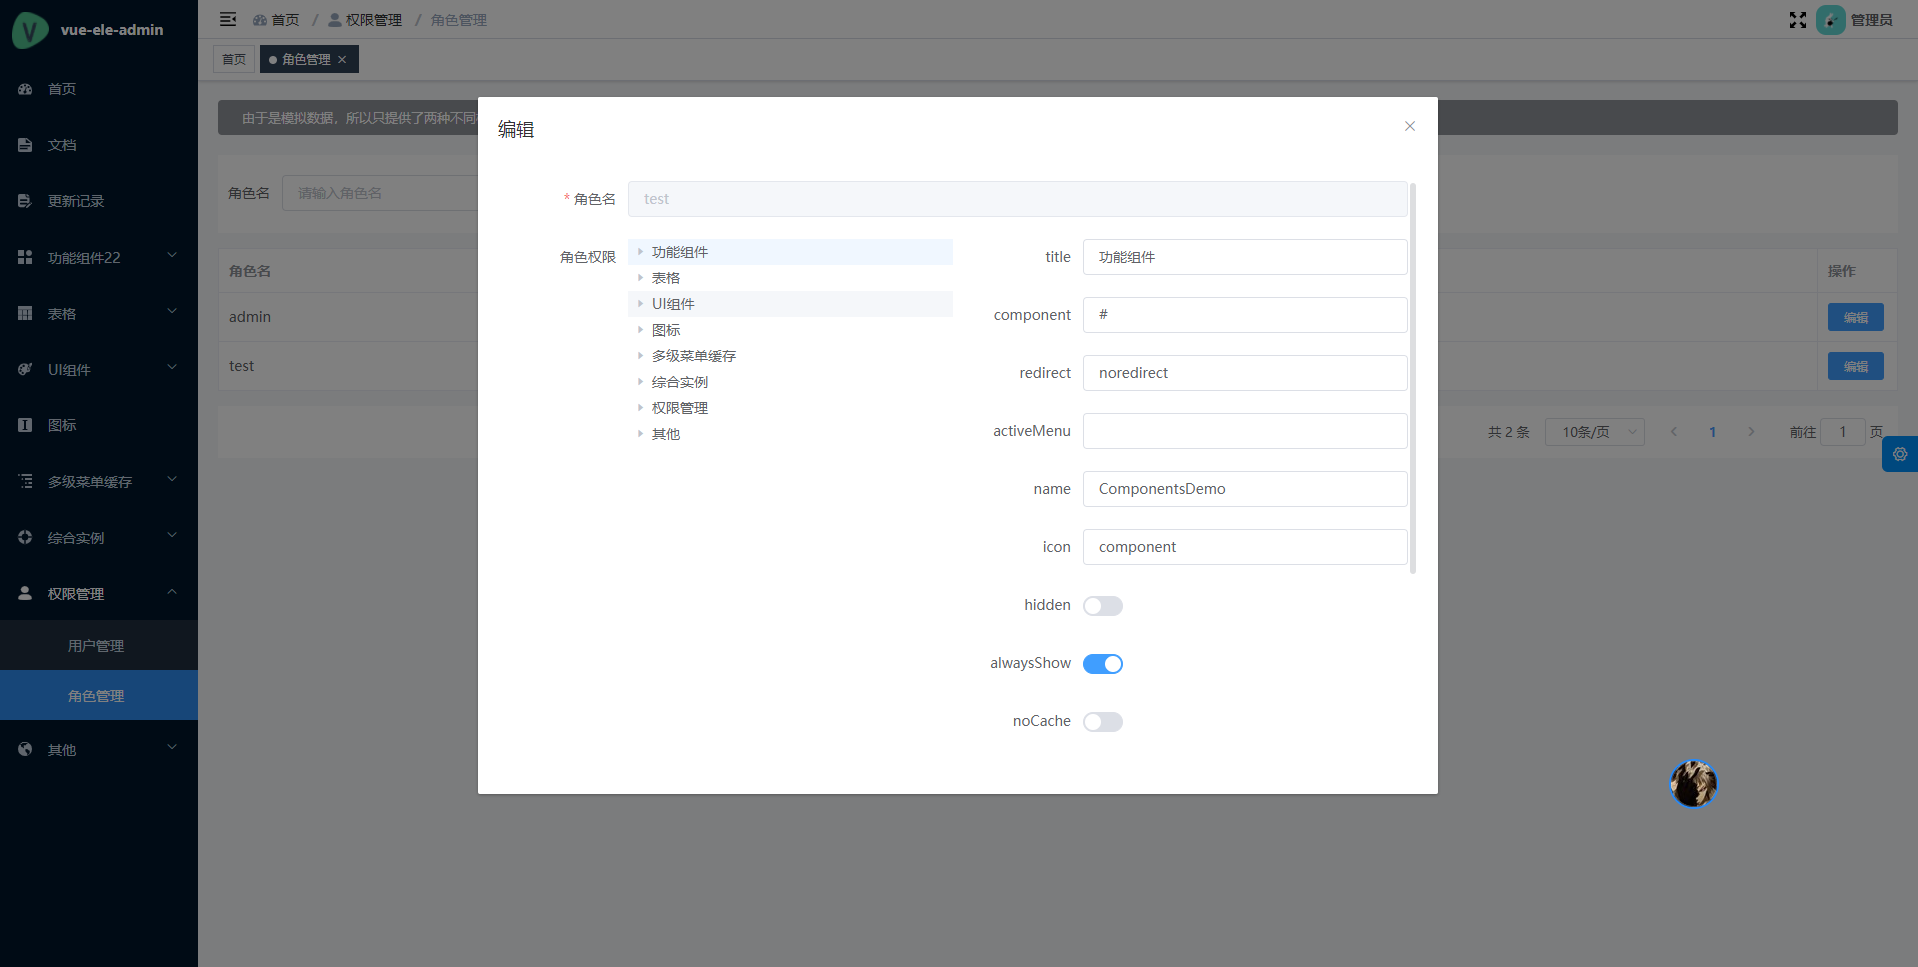
由于是后端控制为主,所以存储在后端就是以树形的方式存储了,便于我们拿到数据之后直接渲染,格式大致如下:
{
  path: '/components-demo',
  component: '#',
  redirect: '/components-demo/echarts',
  name: 'ComponentsDemo',
  meta: {
    title: '功能组件',
    icon: 'component',
    alwaysShow: true
  },
  children: [
    {
      path: 'echarts',
      component: 'views/components-demo/echarts/index',
      name: 'EchartsDemo',
      meta: {
        title: '图表'
      }
    }
  ]
}
component不再是直接加载路由文件了,而是以字符串的形式存在,之后当我们在渲染的时候,才会动态去加载对应的路由文件。
权限过滤的逻辑主要在src/store/modules/permission.ts中的getFilterRoutes方法:
// 模拟后端过滤路由
function getFilterRoutes(routes: AppRouteRecordRaw[]): AppRouteRecordRaw[] {
  const res: AppRouteRecordRaw[] = []

  for (const route of routes) {
    const data: AppRouteRecordRaw | IObj = {
      path: route.path,
      name: route.name,
      redirect: route.redirect
    }
    data.meta = Object.assign({}, route.meta || {}, { title: route.meta.title })
    if (route.component) {
      // 动态加载路由文件,可根据实际情况进行自定义逻辑
      data.component = (
        (route.component as any) === '#'
          ? Layout
          : (route.component as any).includes('##')
          ? getParentLayout((route.component as any).split('##')[1])
          : modules[`../../${route.component}.vue`]
      ) as any
    }
    // recursive child routes
    if (route.children) {
      data.children = getFilterRoutes(route.children)
    }
    res.push(data as AppRouteRecordRaw)
  }
  return res
}
::: tip 提示
后端控制的权限,我们只需要关注component的动态生成就行。
:::
总结
其实我们不用太纠结到底是前端控制还是后端控制,主要还是要根据实际情况来。一般来讲,大多数都是比较推崇使用后端控制,这样就不需要前端修改完配置之后在重新打包部署。
本项目中的例子是相对比较简单的,因为不想给出太复杂的而让开发者有无从下手的感觉。但是流程基本上是一致的,开发者是可以在本项目原有的基础上去扩展。