260 lines
8.9 KiB
Markdown
260 lines
8.9 KiB
Markdown
# 14.4 ユーザの認証
|
||
Webアプリケーションを開発する過程で、ユーザ認証は開発者がよくぶつかる問題です。ユーザのログイン、サインアップ、ログアウト等といった操作で、一般的な認証は3つの方面の認証に分けることができます
|
||
|
||
- HTTP BasicとHTTP Digest認証
|
||
- サードパーティ認証:QQ、weibo、doubian、OPENID、google、github、facebookおよびtwitterなどです
|
||
- カスタム定義のユーザログイン、サインアップ、ログアウトは一般的にsession、cookie認証にもとづいています。
|
||
|
||
beegoは現在この3つの方式のどの形式にも対応していません。しかしサードパーティのオープンソースライブラリによって上の3つの方法のユーザ認証を実装することができます。しかし後々beegoは前者2つの認証を一つ一つ実装するかもしれません。
|
||
|
||
## HTTP BasicとHTTP Digest認証
|
||
この2つの認証はいくつかのアプリケーションが採用している比較的簡単な認証です。現在すでにオープンソースのサードパーティライブラリでこの2つの認証をサポートしています;
|
||
|
||
github.com/abbot/go-http-auth
|
||
|
||
下のコードはこれらのライブラリをどのようにbeegoに導入するかを示しています:
|
||
|
||
package controllers
|
||
|
||
import (
|
||
"github.com/abbot/go-http-auth"
|
||
"github.com/astaxie/beego"
|
||
)
|
||
|
||
func Secret(user, realm string) string {
|
||
if user == "john" {
|
||
// password is "hello"
|
||
return "$1$dlPL2MqE$oQmn16q49SqdmhenQuNgs1"
|
||
}
|
||
return ""
|
||
}
|
||
|
||
type MainController struct {
|
||
beego.Controller
|
||
}
|
||
|
||
func (this *MainController) Prepare() {
|
||
a := auth.NewBasicAuthenticator("example.com", Secret)
|
||
if username := a.CheckAuth(this.Ctx.Request); username == "" {
|
||
a.RequireAuth(this.Ctx.ResponseWriter, this.Ctx.Request)
|
||
}
|
||
}
|
||
|
||
func (this *MainController) Get() {
|
||
this.Data["Username"] = "astaxie"
|
||
this.Data["Email"] = "astaxie@gmail.com"
|
||
this.TplNames = "index.tpl"
|
||
}
|
||
|
||
上のコードはbeegoのprepare関数を利用しています。正常なロジックを実行する前に認証関数をコールすることで、非常に簡単にhttp authを実装しています。digest認証も同様の原理です。
|
||
|
||
## oauthとoauth2の認証
|
||
oauthとoauth2は現在比較的流行している二種類の認証方式です。サードパーティでちょうどこの認証を実装しているライブラリがあるのですが、国外で実装されたもので、QQ、weiboといった中国国内のアプリケーション認証はありません。
|
||
|
||
github.com/bradrydzewski/go.auth
|
||
|
||
下のコードはどのようにしてこのライブラリをbeegoの中に導入しoauth認証を実装するか示しています。ここではgithubを例にしています:
|
||
|
||
1. ルーティングを2本追加
|
||
|
||
beego.RegisterController("/auth/login", &controllers.GithubController{})
|
||
beego.RegisterController("/mainpage", &controllers.PageController{})
|
||
|
||
2. 次にGithubControllerログインの画面を処理:
|
||
|
||
package controllers
|
||
|
||
import (
|
||
"github.com/astaxie/beego"
|
||
"github.com/bradrydzewski/go.auth"
|
||
)
|
||
|
||
const (
|
||
githubClientKey = "a0864ea791ce7e7bd0df"
|
||
githubSecretKey = "a0ec09a647a688a64a28f6190b5a0d2705df56ca"
|
||
)
|
||
|
||
type GithubController struct {
|
||
beego.Controller
|
||
}
|
||
|
||
func (this *GithubController) Get() {
|
||
// set the auth parameters
|
||
auth.Config.CookieSecret = []byte("7H9xiimk2QdTdYI7rDddfJeV")
|
||
auth.Config.LoginSuccessRedirect = "/mainpage"
|
||
auth.Config.CookieSecure = false
|
||
|
||
githubHandler := auth.Github(githubClientKey, githubSecretKey)
|
||
|
||
githubHandler.ServeHTTP(this.Ctx.ResponseWriter, this.Ctx.Request)
|
||
}
|
||
|
||
|
||
3. ログインに成功した後のページ画面を処理
|
||
|
||
package controllers
|
||
|
||
import (
|
||
"github.com/astaxie/beego"
|
||
"github.com/bradrydzewski/go.auth"
|
||
"net/http"
|
||
"net/url"
|
||
)
|
||
|
||
type PageController struct {
|
||
beego.Controller
|
||
}
|
||
|
||
func (this *PageController) Get() {
|
||
// set the auth parameters
|
||
auth.Config.CookieSecret = []byte("7H9xiimk2QdTdYI7rDddfJeV")
|
||
auth.Config.LoginSuccessRedirect = "/mainpage"
|
||
auth.Config.CookieSecure = false
|
||
|
||
user, err := auth.GetUserCookie(this.Ctx.Request)
|
||
|
||
//if no active user session then authorize user
|
||
if err != nil || user.Id() == "" {
|
||
http.Redirect(this.Ctx.ResponseWriter, this.Ctx.Request, auth.Config.LoginRedirect, http.StatusSeeOther)
|
||
return
|
||
}
|
||
|
||
//else, add the user to the URL and continue
|
||
this.Ctx.Request.URL.User = url.User(user.Id())
|
||
this.Data["pic"] = user.Picture()
|
||
this.Data["id"] = user.Id()
|
||
this.Data["name"] = user.Name()
|
||
this.TplNames = "home.tpl"
|
||
}
|
||
|
||
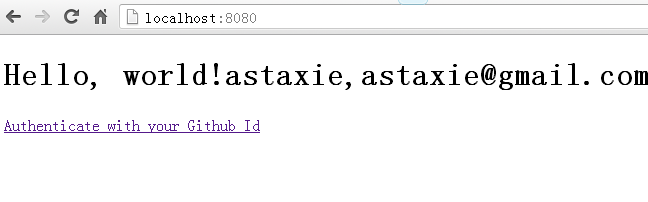
全体の流れは以下のようになります。まずブラウザを開いてアドレスを入力します:
|
||
|
||
|
||
|
||
図14.4 ログインボタンを持つトップページの表示
|
||
|
||
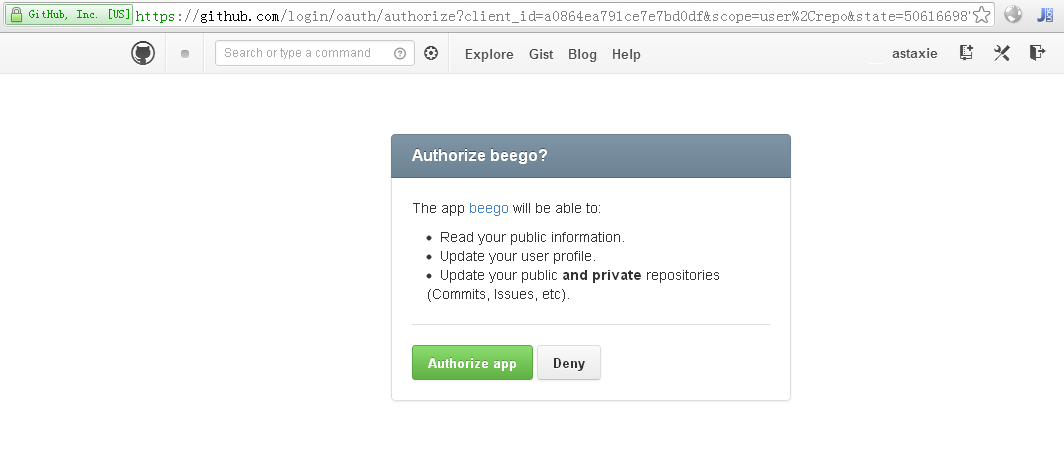
次にリンクをクリックすると以下のようなインターフェースが現れます:
|
||
|
||
|
||
|
||
図14.5 ログインボタンをクリックしてgithubの権限取得ページを表示
|
||
|
||
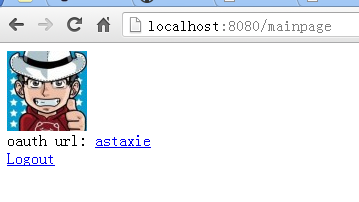
Authorize appをクリックすると以下のようなインターフェースが現れます:
|
||
|
||
|
||
|
||
図14.6 権限取得にログインした後表示される取得済みのgithub情報のページ
|
||
|
||
## カスタム定義認証
|
||
カスタム定義の認証は一般的にはsessionと組み合わせて検証されます。以下のコードはあるbeegoのオープンソースブログに基づいています:
|
||
|
||
|
||
//ログイン処理
|
||
func (this *LoginController) Post() {
|
||
this.TplNames = "login.tpl"
|
||
this.Ctx.Request.ParseForm()
|
||
username := this.Ctx.Request.Form.Get("username")
|
||
password := this.Ctx.Request.Form.Get("password")
|
||
md5Password := md5.New()
|
||
io.WriteString(md5Password, password)
|
||
buffer := bytes.NewBuffer(nil)
|
||
fmt.Fprintf(buffer, "%x", md5Password.Sum(nil))
|
||
newPass := buffer.String()
|
||
|
||
now := time.Now().Format("2006-01-02 15:04:05")
|
||
|
||
userInfo := models.GetUserInfo(username)
|
||
if userInfo.Password == newPass {
|
||
var users models.User
|
||
users.Last_logintime = now
|
||
models.UpdateUserInfo(users)
|
||
|
||
//ログイン成功でsessionを設定
|
||
sess := globalSessions.SessionStart(this.Ctx.ResponseWriter, this.Ctx.Request)
|
||
sess.Set("uid", userInfo.Id)
|
||
sess.Set("uname", userInfo.Username)
|
||
|
||
this.Ctx.Redirect(302, "/")
|
||
}
|
||
}
|
||
|
||
//サインアップ処理
|
||
func (this *RegController) Post() {
|
||
this.TplNames = "reg.tpl"
|
||
this.Ctx.Request.ParseForm()
|
||
username := this.Ctx.Request.Form.Get("username")
|
||
password := this.Ctx.Request.Form.Get("password")
|
||
usererr := checkUsername(username)
|
||
fmt.Println(usererr)
|
||
if usererr == false {
|
||
this.Data["UsernameErr"] = "Username error, Please to again"
|
||
return
|
||
}
|
||
|
||
passerr := checkPassword(password)
|
||
if passerr == false {
|
||
this.Data["PasswordErr"] = "Password error, Please to again"
|
||
return
|
||
}
|
||
|
||
md5Password := md5.New()
|
||
io.WriteString(md5Password, password)
|
||
buffer := bytes.NewBuffer(nil)
|
||
fmt.Fprintf(buffer, "%x", md5Password.Sum(nil))
|
||
newPass := buffer.String()
|
||
|
||
now := time.Now().Format("2006-01-02 15:04:05")
|
||
|
||
userInfo := models.GetUserInfo(username)
|
||
|
||
if userInfo.Username == "" {
|
||
var users models.User
|
||
users.Username = username
|
||
users.Password = newPass
|
||
users.Created = now
|
||
users.Last_logintime = now
|
||
models.AddUser(users)
|
||
|
||
//ログイン成功でsessionを設定
|
||
sess := globalSessions.SessionStart(this.Ctx.ResponseWriter, this.Ctx.Request)
|
||
sess.Set("uid", userInfo.Id)
|
||
sess.Set("uname", userInfo.Username)
|
||
this.Ctx.Redirect(302, "/")
|
||
} else {
|
||
this.Data["UsernameErr"] = "User already exists"
|
||
}
|
||
|
||
}
|
||
|
||
func checkPassword(password string) (b bool) {
|
||
if ok, _ := regexp.MatchString("^[a-zA-Z0-9]{4,16}$", password); !ok {
|
||
return false
|
||
}
|
||
return true
|
||
}
|
||
|
||
func checkUsername(username string) (b bool) {
|
||
if ok, _ := regexp.MatchString("^[a-zA-Z0-9]{4,16}$", username); !ok {
|
||
return false
|
||
}
|
||
return true
|
||
}
|
||
|
||
ユーザのログインとサインアップがあって、その他のモジュールでも以下のようにユーザがログインしているかどうかの判断を追加することができます:
|
||
|
||
func (this *AddBlogController) Prepare() {
|
||
sess := globalSessions.SessionStart(this.Ctx.ResponseWriter, this.Ctx.Request)
|
||
sess_uid := sess.Get("userid")
|
||
sess_username := sess.Get("username")
|
||
if sess_uid == nil {
|
||
this.Ctx.Redirect(302, "/admin/login")
|
||
return
|
||
}
|
||
this.Data["Username"] = sess_username
|
||
}
|
||
|
||
## links
|
||
* [目次](<preface.md>)
|
||
* 前へ: [フォームおよび検証のサポート](<14.3.md>)
|
||
* 次へ: [多言語サポート](<14.5.md>)
|